Pages

Showing posts with label Gluten-Free. Show all posts

Monday, January 6, 2014

Cold Day Off and Braised Brisket with Grilled Vegetables

Frost and snow look beautiful when you can stay in.
Today in Minnesota was a rare day when things actually shut down for the weather; with wind-chill it felt like -44ºF when we got up today.  Schools were called off by the governor, many businesses were closed, and Sous Chef and I got to sleep in.

We decided to start the day off with a Sunday breakfast on a Monday.  We made, then ate, our gluten-free doughnuts and bacon while watching episodes of Iron Chef America on Amazon Prime.  Some kids know sports stats; Sous Chef knows Chef stats.  She can tell you what type of food the chefs are good at, what foods they have made in competitions, and the scores they have received.  She will recount great culinary feats like they were the winning plays in the Superbowl.

Besides watching cooking shows, I took time today to make a long cooking dinner.  I had gotten a brisket this weekend when I went grocery shopping before the storm (or in this case cold).  If you have never been to a grocery store in the Midwest before a predicted snow storm or insane cold-snap it is quite the experience.  It is kind of like squirrels scurrying around gathering nuts before the winter hits.  People are going every which way, inexperienced shoppers are out, eyes glazed over like a deer in headlights blocking the aisles. We are all worried that we may not be able to get to the store for weeks so we stock up so we can hibernate until it gets a little less subarctic.  We still wait patiently in line talking about how bad the storm is supposed to be, and comparing it to storms of the past.  If there is one thing a Minnesotan likes to talk about it is the weather.

I had my brisket, some vegetables, a new grill pan, and a day off.  (I have no idea how I lived without a grill pan until now). Brisket is a slow-and-low kind of cooking meat, so a freezing day off was perfect to create a new recipe for it.  I decided to keep the seasonings simple and used kosher salt, pepper, and paprika and let the veggies be the star flavorings in the dish.  I let the seasoned brisket chill in the fridge for a few hours, then took it out a half hour before cooking it to let it come to room temperature.


I chopped my veggies into large pieces, since they were going to be both grilled and then braised for a long time.  Too small of pieces would have ended up with just mush.  By keeping the pieces large they were able to withstand the cooking process and turn out both tender and flavorful.

Grill Marks!


I had saved the bacon grease from this morning, so I used that to grease my pan.  Vegetable or Olive oil would have worked fine, but the bacon fat gave it a nice flavor.  I grilled the veggies in batches and let them get some nice grill marks on them, rotating a few times before removing to a plate.
I wanted to eat these then, but I saved them for the roast.

After the veggies were done, I put my braising pan on heat, added a bit of bacon fat and browned the brisket.  I browned the fat-side down first and let some of the fat render out.  I always want to keep checking the meat, but I resisted the urge and let it sit for about four minutes before peeking.

Let the meat brown, don't keep checking it.


 It was nicely browned after about five minutes, then I browned the other side.  Draining the fat is optional, but there is no need to keep it in the pan.


All of the vegetables got added into the pan, along with a quart (that's 4 cups) of beef stock, a sachet of thyme and parsley (fresh herbs tied together in cheese cloth) and a bit of salt and pepper.
I love the bright pop of color in this.
                         
I covered the dish and let it cook at 325º for 3 1/2 hours.  I checked it at about 2 1/2 and stirred around the vegetables.  This wasn't necessary, but like browning the meat I really wanted to check it.

There wasn't a lot of braising liquid left to really make a pan sauce after, since it had all nicely caramelized the vegetables.  I could have added wine to make a real pan sauce, but simply added a few tablespoons of butter, after I removed the meat and veggies, to deglaze the pan.  I shook in a bit of Worcestershire sauce and let it start to bubble.  I strained this and used it as a butter sauce to dribble over the top of the meat.
Brisket, nice and tender


My favorite thing about this dish was the different textures and flavors that were in it. The carrots really popped with sweetness, while the potatoes were still sturdy.


The veggies, really the star of this dish
 It was a hit on this cold day, which we finished off watching one last episode of Iron Chef America while eating Mint Chocolate Mousse.  We get another day off for the cold tomorrow.  We haven't decided what we are cooking yet.

Friday, January 3, 2014

Barely a Recipe- Barbecue Chicken

Sometimes I love recipes with lots of steps.  Recipes that rely on careful preparation and a lot of technique.  These recipes let me use my knife skills, practice techniques, and build flavors in multiple ways.  These recipes are weekend recipes, company recipes, and recipes that I play with on vacation days-to me a vacation is spending all day in the kitchen.

There are other times that I need a quick throw-togehter-but-still-taste-good recipe.  The kind of recipe that lets me cook automatically without any fuss.  In less than 15 minutes I can go from getting home to getting food on the table, or in a thermos for my Sous-Chef to eat on the road to activities.  These recipes I call "barely a recipe", because there isn't much, if any, measuring, and I can grab what I have on hand to complete the meal. Any prep and cooking technique is so minimal that it is all automatic, even for an infrequent cook.  The more you cook the faster your prep time gets, but these are seriously fast.
Rotisserie Chicken, BBQ Sauce, Garlic & Onion

My barely a recipe barbecue chicken is one of these recipes. All you need is a rotisserie chicken, BBQ sauce, garlic and onions.  A note on rotisserie chickens:  I always use Costco's chickens.  They are gluten free, fresh, and taste great.  If you don't have a Costco by you (or a rotisserie chicken handy) you can simply sub in precooked chicken of any kind to equal about 1-2 lbs, or 2-3 chicken breasts.  If you are gluten-free, or have other dietary restrictions, check the ingredient list on your BBQ sauce.  If you feel like adding spices; paprika, chipotle or adobo, or cracked pepper would all be good here, you can, but this is good without any additional spices as well.

The thing that will take you the longest is butchering (read; cutting up) the chicken.  This gets a lot faster with practice, and can be done ahead of time so all you have to do is grab the cut up chicken out of the fridge.  Even easier; Costco sells their chicken already pre-cooked and diced.

Cut up rotisserie chicken.
 Step 1: Cut up the rotisserie chicken.  I find the only part of the bird I don't use are the ends of the wings.  Remove the skin and rough chop the chicken.
Skin removed and cut up chicken

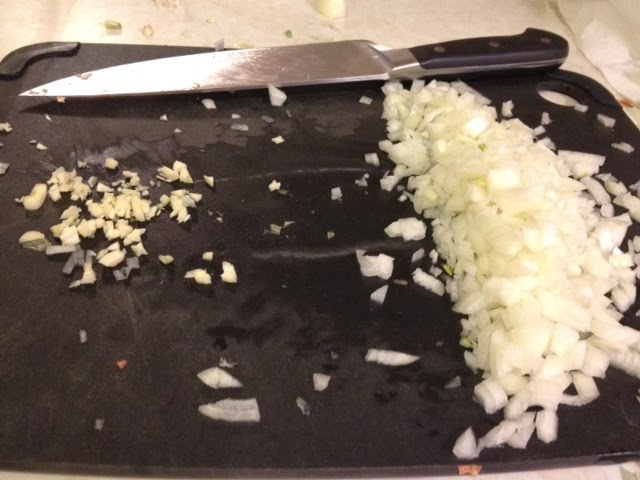
Step 2:  Dice two small, or one medium, onions and two cloves of garlic

Step 3: Heat olive oil over medium high heat in a large nonstick pan, and add onions.  Stir frequently until beginning to brown.  (reduce heat if needed)

Step 4: Add garlic and heat for about 45 seconds, stirring a few times.

Step 5: Add chicken.  Stir and let chicken brown slightly.

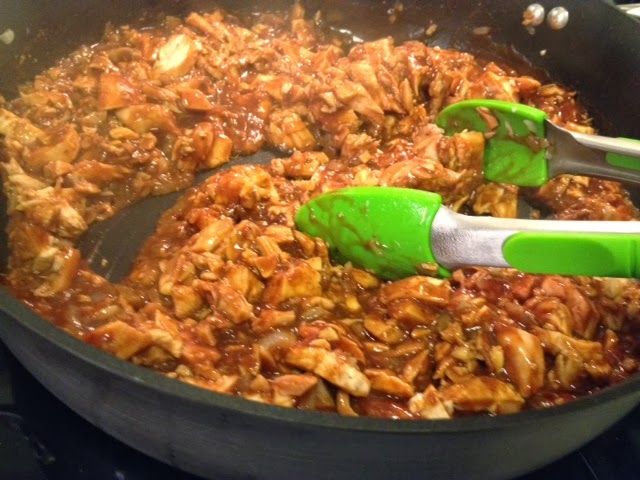
Tongs work really well for this dish!

Step 6: Add BBQ sauce.  Stir, turn heat down and simmer for about 5 minutes until heated through.  Use enough BBQ sauce to coat the chicken well. I used about 2/3 of the bottle.


That is it!  Serve along with cheese bread, veggies, rice, or whatever you like to eat with BBQ chicken.  If you want to add additional seasonings add them after you have mixed in the BBQ sauce.  Super quick, super easy, barely a recipe.

Enjoy!


Tuesday, December 31, 2013

Herb Crusted Pork Tenderloin

Herb Crusted Pork Tenderloin

Some foods are synonymous with the holidays; peppermint, chocolate, roasts.  Eating a cookie, a roll, or a family favorite can transport you instantly to the past faster than the Tardis. The taste and smells of these familiar foods take you to a place, and to people that may be long gone.   This pork tenderloin is something that takes me back.

For many years this dish sat at the center of my family's Christmas table.  The pool table in the basement would have the ping-pong top placed on, then covered with one of my great-grandmother's tablecloths.  My small family growing large when grandmothers, aunts, uncles and cousins from both sides of the family came together to celebrate.  At some point the traditional standing rib roast was replaced with the pork tenderloin.  The cook time is far less, the meat is cheaper, and it feeds a lot of people.  Timing church, presents, and hors d'oeuvres probably necessitated the switch when we were younger.  However, you don't have to wait until next year's Christmas Dinner, or even a big celebration to enjoy it.  The simple prep and quick cooking time that made this a hit on Christmas make it a great weeknight dinner as well.

The amount of pork that you use depends on how many people you are feeding.  The 2Lb pork tenderloins I got at Trader Joe's would feed about 8-12 people.  If you are having more people, or like more than 2 slices each get more pork.

Herb Mix
The list of herbs seems like a lot.  Most of them are ingredients that are frequently used, all can be found at most grocery stores, or my favorite spice store Penzey's.  This amount of spices can work for 2-4 lbs of pork.  It makes a nice thick crust. Mix all of the spices thoroughly before adding the water.
Water is added to make a paste
Add the water slowly to make a paste.  It should be fairly thick and not runny.  Make sure you mix to the bottom to get all of the spices incorporated.  Place the pork tenderloins in a baking dish (I like to use a glass 9X13) and spread the mixture on with your hands.  This really is a time that your hands are far superior to any kitchen utensil.
Spread the mixture with your hands (the spoon is not in the dish, by the way)
Marinating for 20 minutes
Once completely covered in seasoning, let the meat marinate for about 20 minutes.  Turn on the stove to 325º.  Once 20 minutes has passed bake the tenderloin for 30-45 minutes. The exact time depends on your oven (convection is faster) and the thickness of the meat.  The pork is done when it reaches an internal temp of 145º.  (No one wants overcooked pork).  If the ends begin to cook faster than the centers, cover the edges of the pan with foil.

Once done, let the pork rest for about 5 minutes.  Slice and serve.
Resting 
Enjoy!

P.S.  If you have picky eaters who don't like the texture or amount of seasoning, it can easily be taken off of individual pieces leaving a milder taste.